An LED display can fail in small, visible ways: one dark cabinet, a flickering row, uneven color, or a message that arrives late. The cause is not always the screen itself. A loose data cable, unstable power, excess heat, or an incorrect processor setting can produce similar symptoms. Good troubleshooting starts with observation, not guesswork.
As a composite field-service expert, Alex Chen puts it: “Trace the signal and power path before replacing parts; the first visible fault may not be the source.” This is an illustrative quotation, not a statement from a verified individual. The principle is practical: note when the fault began, check whether it affects one module or the whole display, and inspect connections before changing settings. Take a photo. Record what you changed.
This guide, “7 Best Ways to Troubleshoot Common LED Display Issues,” explains How to troubleshoot common LED display issues with careful, repeatable checks. It covers power, signal, image quality, temperature, and control-system settings. Some faults look obvious. Others are intermittent, and a quick fix can hide the real cause. That part is easy to miss. Use the steps to narrow the possibilities, document results, and know when a qualified technician should inspect the display. A methodical check is not glamorous, but it often prevents needless component swaps and brings the screen back with fewer surprises.
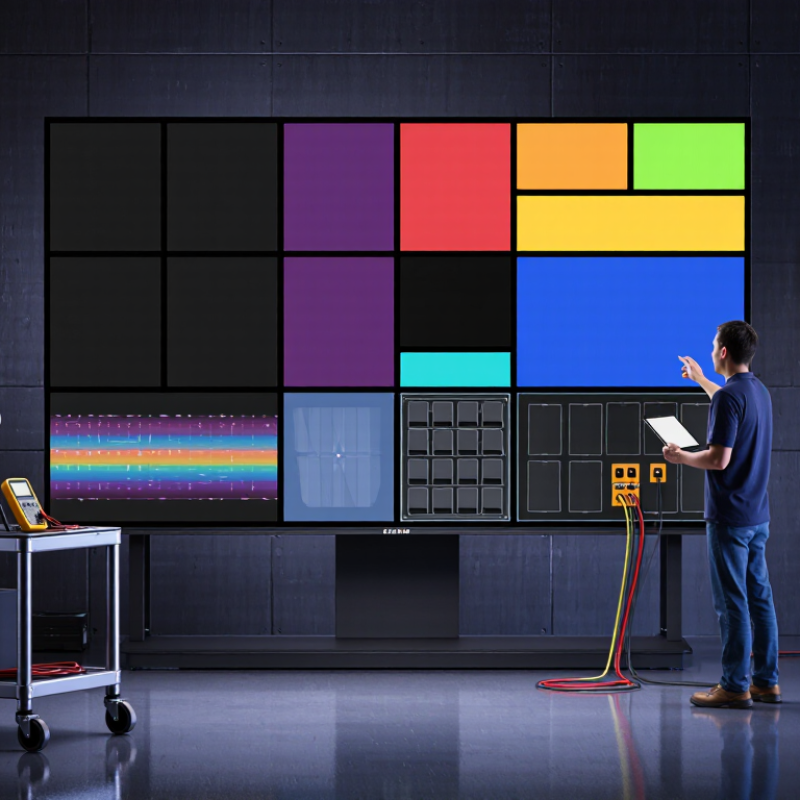
LED display faults often begin with small, repeatable symptoms. A dark tile or horizontal band may indicate a loose data connection, a failed module, or interrupted power. Check whether the defect stays in the same place after the content changes. That detail matters. If it moves with the image, the source or processing path may be responsible instead.
Flicker can result from unstable power, a poor cable connection, or a refresh-rate mismatch. It may appear only on camera, where shutter timing interacts with the display’s refresh cycle. A persistent color cast across one panel can suggest a channel, calibration, or module issue. A whole-screen color shift may point to input settings. Compare neighboring panels with the same neutral gray image. Subtle differences show up fast.
Uneven brightness, faint lines, and intermittent blanking need separate checks. Dust, heat, aging LEDs, and failing power supplies can all reduce brightness, but appearance alone cannot confirm the cause. Note when the symptom starts and whether the cabinet feels unusually warm. Don’t open power cabinets unless qualified, and never reseat live connections. A restart may help, but it can also hide an intermittent pattern. Even a careful diagnosis can miss one. Record photos and test one variable at a time before replacing parts.
Before adjusting display settings, check the power path. Confirm the outlet or distribution circuit is working, then inspect the display’s power supply indicators. A dark screen may point to a loose input plug, while flickering across several panels can suggest unstable power. Shut the system down before reseating connectors. Never open a power supply; internal components can retain dangerous charge. If voltage needs testing, use the equipment’s rated procedure and involve a qualified technician.
Check each cable from source to display. Look for crushed insulation, bent pins, loose locking tabs, and connectors that sit slightly crooked. Dust can also prevent a firm connection. A small brush or dry, lint-free cloth may help; avoid moisture near powered equipment. Replace one suspect cable at a time with a known-good, correctly rated cable. This makes the cause easier to isolate. It is easy to blame the screen too soon.
Physical connections deserve a close look. Verify that input and output ports are not confused, and that cable weight is not pulling on a connector. Check for blocked vents, too, since heat can cause intermittent faults. Note which panels fail and when the problem appears. Patterns matter. A rushed inspection can miss a half-seated plug, so recheck your work before restoring power.
A blank or flickering LED display does not always point to a failed panel. Check the source first. Confirm that the media player, computer, or controller is powered on and sending an active signal. Then verify the selected input on the display system. A small mismatch, such as choosing HDMI instead of DisplayPort, can look like a major fault.
Trace the signal path one connection at a time. Inspect both ends of each cable for loose plugs, bent pins, or visible damage. If possible, connect the source directly to the display, bypassing splitters, converters, and wall plates. Test with a short, known-good cable. This helps narrow down where the signal drops. A status light can be useful, but it does not confirm that the image data is clean.
Display settings matter, too. Check that output resolution and refresh rate are supported by the display and its processor. Look for unusual scaling, brightness, or color settings that could make an image appear distorted. Change one setting at a time, and record the original value. It is tempting to adjust everything at once; I have found that this often makes the cause harder to identify. If the issue remains, compare the same source and cable on another compatible screen. A symptom is a clue, not a diagnosis.
Uneven brightness can come from a setting, a weak power connection, or a failing panel. Check the display’s brightness level first, then compare it with nearby screens under the same lighting. If only one area looks dim, inspect its power and signal connections. Shut the display down before reseating external cables. Small changes matter.
Color problems need a careful comparison. Show a neutral gray or white image and look for tinted patches or inconsistent whites. Confirm the source device uses the expected color mode, then check the display’s color temperature and input settings. A phone camera can reveal banding, but it may also exaggerate it. Trust your eyes and a known test image together.
Flicker may point to a loose signal cable, an unstable power feed, or a refresh-rate mismatch. Try a secure cable and a compatible refresh setting; note whether the flicker changes. For dead pixels, display solid red, green, blue, white, and black screens to map affected spots. One isolated pixel differs from a growing cluster. Don’t press hard on the panel. It is easy to blame the screen too soon, and source settings are often overlooked. If symptoms persist after these checks, record their location and pattern for a qualified technician.
| Issue | Common Causes | How to Check | Recommended Action | How to Confirm the Fix |
|---|---|---|---|---|
| Uneven or low brightness | Incorrect brightness settings, an unsuitable ambient-light setting, loose power connections, or a failing power supply. | Display a full-white test image. Compare affected areas and check brightness settings, power indicators, and cable connections. | Set brightness to an appropriate level and disable automatic brightness temporarily for testing. If safe to do so, power down before checking accessible connections. Have a qualified technician inspect suspected power-supply faults. | Recheck the full-white image and several gray levels. Brightness should appear consistent across the display without unexpected dim sections. |
| Incorrect color or color tint | Incorrect color-temperature or picture settings, a poor-quality signal, a loose data connection, or a mismatch between display configuration and source content. | Show solid red, green, blue, and white test images. Check whether the tint affects the whole screen or only a particular section or input. | Restore neutral picture settings, verify the source format, and reconnect signal cables with the equipment powered off. If only one section is affected, request a module or receiver-card inspection. | Confirm that primary-color test images look uniform and that neutral gray and white images have no obvious color cast. |
| Flickering or intermittent flashing | Unstable power, loose signal cables, an incorrect refresh-rate setting, electromagnetic interference, or a failing component. | Check whether flicker changes with the source, input, or refresh-rate setting. Inspect cable routing and look for loose connections or visible power warnings. | Secure connections while the system is powered down, use the display's supported refresh rate, and keep signal cables away from strong electrical interference where practical. Refer persistent flicker to a technician. | Run a moving test pattern and view the display at normal operating distance. The image should remain stable across inputs and content. |
| Dead, stuck, or discolored pixels | Pixel or subpixel failure, module damage, or a localized connection fault. | Display solid-color patterns and note the affected pixel locations. Check whether the defect stays in the same place when the source or content changes. | Restart the display and check the manufacturer's pixel-repair or service guidance. Do not press, scrape, or apply heat to the screen. Arrange module-level service if the defect persists. | Repeat the solid-color tests and compare the number and location of visible defects with the display's applicable service criteria. |
| Horizontal or vertical lines | A damaged signal cable, a loose connection, a fault in a display module, or an issue in the receiving or processing path. | Check whether lines appear on the display's menu or built-in test pattern as well as on external content. Note whether they are fixed or intermittent. | Power down before reseating accessible cables. Test with a known-good signal source if available. If lines remain on built-in patterns, request inspection by a qualified technician. | Verify that built-in patterns and source content display without persistent lines or missing rows and columns. |
| Image appears blurred, blocky, or incorrectly scaled | Source resolution or aspect-ratio mismatch, unsuitable scaling, compression, or a loose or unsuitable signal connection. | Check the source resolution, display resolution, aspect ratio, and any scaling settings. Compare text and fine-detail content with a known-good test image. | Set the source to a supported resolution and use the display's recommended scaling mode. Check signal connections and avoid unnecessary conversion steps. | Inspect text, edges, and fine patterns. Content should be correctly framed and as sharp as the display's pixel pitch and source quality allow. |
| Blank screen or no signal | Display power interruption, the wrong input selection, a disconnected source, a failed signal cable, or an issue with the controller or receiving path. | Check power indicators, the selected input, source-device output, and cable connections. Test another supported input or known-good source if available. | Confirm that the display and source are powered on, select the correct input, and reconnect cables with equipment powered down. Escalate if power indicators show a fault or the screen remains blank. | Confirm that the display shows a stable image from the intended source and that the signal remains present during normal operation. |
Safety note: Follow the display's service instructions. Disconnect power before handling accessible connections, and leave internal electrical repairs to qualified technicians.
After a module replacement, run the display at normal brightness for at least 30 minutes. Watch for flicker, color shifts, and dark pixels as the panel warms. Record the affected cabinet, input source, brightness setting, and room temperature. Small clues matter. A fault that appears only on a bright white test image may point to a different load condition than one visible on black.
Test repairs with a color-bar pattern, grayscale ramps, and moving content. Check connectors for looseness, oxidation, or bent pins; reseat them only after power is isolated. Use a thermal camera, where available, to compare hot spots across neighboring cabinets. IES LM-80 testing collects LED lumen-maintenance data over at least 6,000 hours. That component-level evidence can inform aging expectations, but it does not certify a complete display wall.
Prevent repeat failures by logging each repair and comparing symptoms over time. Clean intake filters, keep ventilation paths open, and verify that cabinet temperatures remain within the manufacturer’s specified range. Replace damaged cables rather than repeatedly bending them into place. I have seen intermittent faults return after a quick reseat; that is a reminder that symptom removal is not root-cause testing. Retest after the system has cooled and warmed again, and keep dated photos of any recurring pixel or color issue.
Confirm the source device is powered on and sending a signal. Check that the display uses the correct input. A small mismatch can look serious.
Inspect both cable ends for loose plugs, bent pins, or damage. Connect the source directly to the display if possible. Try a short, known-good cable. One change at a time.
Check that the resolution and refresh rate are supported. Review scaling, brightness, and color settings. Record each original value before changing it. I sometimes forget this step.
Check the brightness setting and compare nearby screens under similar lighting. If one area looks dim, inspect its power and signal connections. Shut the display down before reseating external cables.
Show a neutral gray or white image and look for tinted patches. Check the source color mode and display color temperature. A phone camera can exaggerate banding, so compare with your eyes, too.
Secure the signal cable and try a supported refresh rate. Note whether the flicker changes. An unstable power feed may also be involved.
Display solid red, green, blue, white, and black screens. Note the location and pattern of affected spots. A single pixel is different from a growing cluster. Don’t press the panel.
If the problem continues after these checks, record where and when it appears. Include any changes you tried. A symptom is a clue, not a diagnosis.
How to troubleshoot common LED display issues starts with recognizing the symptoms and narrowing down their likely causes. Begin by checking the power supply, cables, connectors, and other physical connections for looseness or damage. Then verify that the input source is active, the signal path is secure, and the display settings match the connected equipment. These basic checks can resolve many problems before more detailed testing is needed.
For issues such as uneven brightness, inaccurate colors, flickering, or dead pixels, adjust settings one at a time and inspect whether the symptoms change. After making a repair or adjustment, test the display across different content and operating conditions to confirm the problem is resolved. Keeping connections secure, providing suitable power, and periodically inspecting the display can help prevent recurring faults and maintain reliable performance.

Xiguang Display